I'm on a roll, and now we're gettin' into the thick of things:
Up to this point, I haven't bothered draining any fluids out because it's been mostly external stuff we've been taking off. Now, however, we're going to have to drain the coolant because unlike the oil which drains back into the oil pan when the engine is off, the coolant remains all through the engine under pressure.
Every bucket/pan/pail I had wouldn't fit under the front end (hell,
I don't fit under the front end, lol), so I got one of these things from Farm and Fleet for all of $9.00:
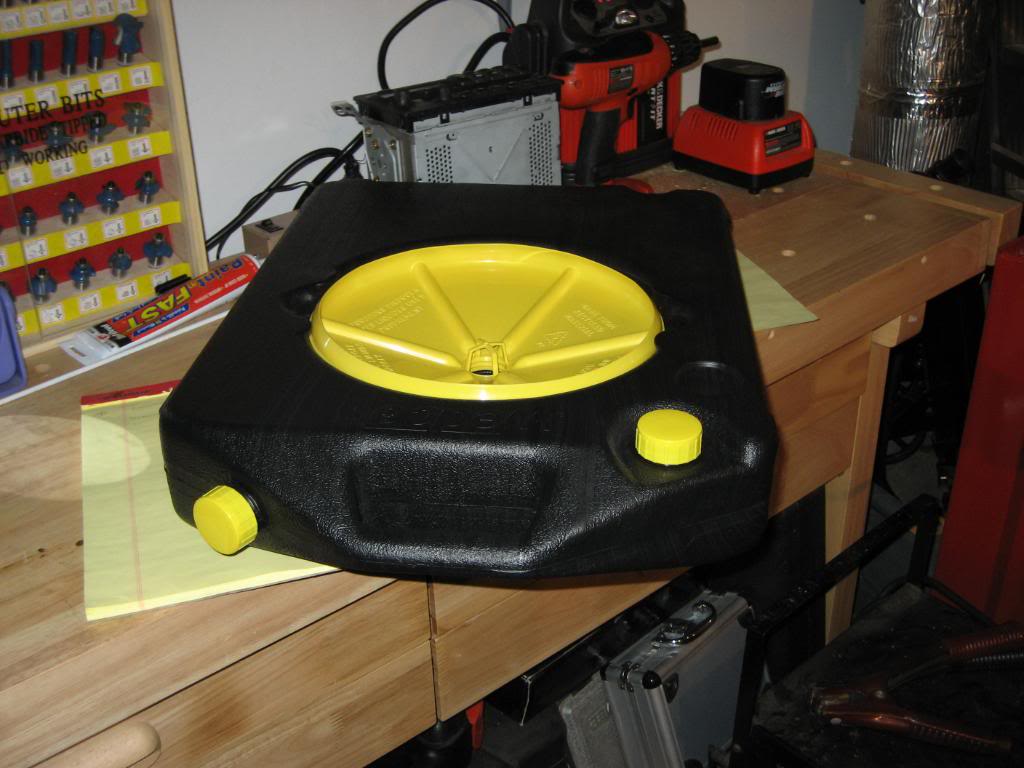
Holds 12.5 quarts or 3.5 gallons of whatever - funnel snaps on the top, screws into the yellow cap near it on top...other yellow cap is for pouring liquid back out, and it will stand up so it's nice and skinny and portable:
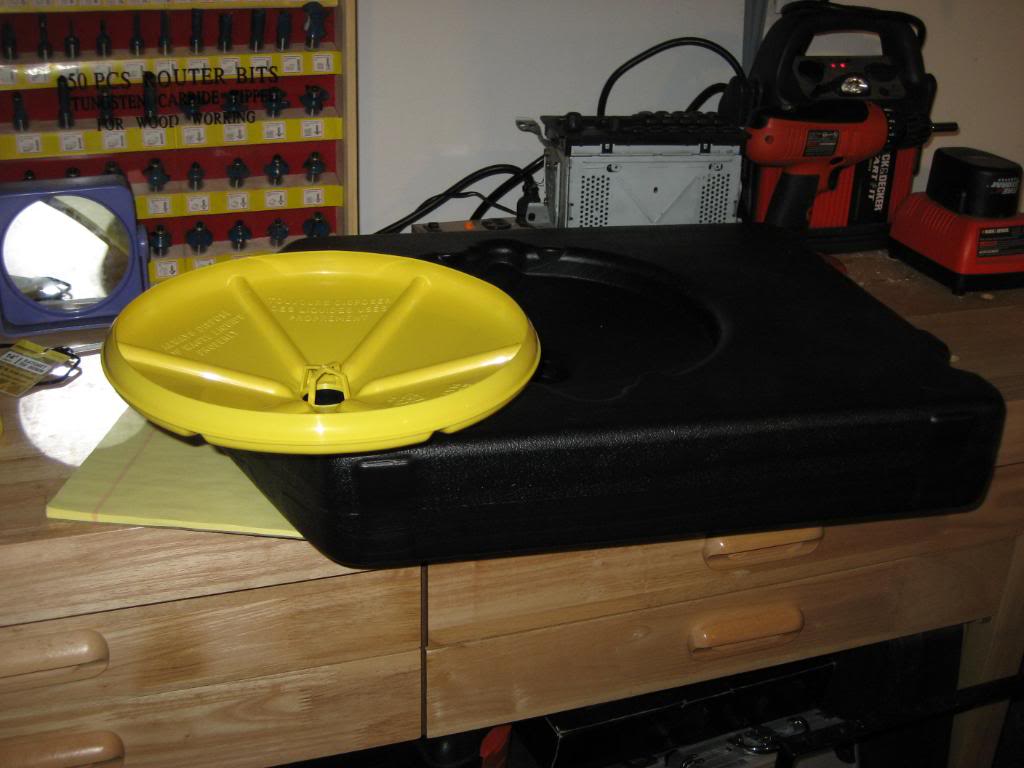
Best of all, it fits under the Tek front end perfectly!
So, now we have something to catch the coolant in to either re-use it or dispose of it, now we need to get it draining.
The draincock is all the way at the bottom right side of the radiator (driver's side). It's not easy to get to from the top or the bottom, so I started to get some stuff out of the way so I could see what I was aiming for.
First, I undid the latches for the air filter housing:
Underside of housing:
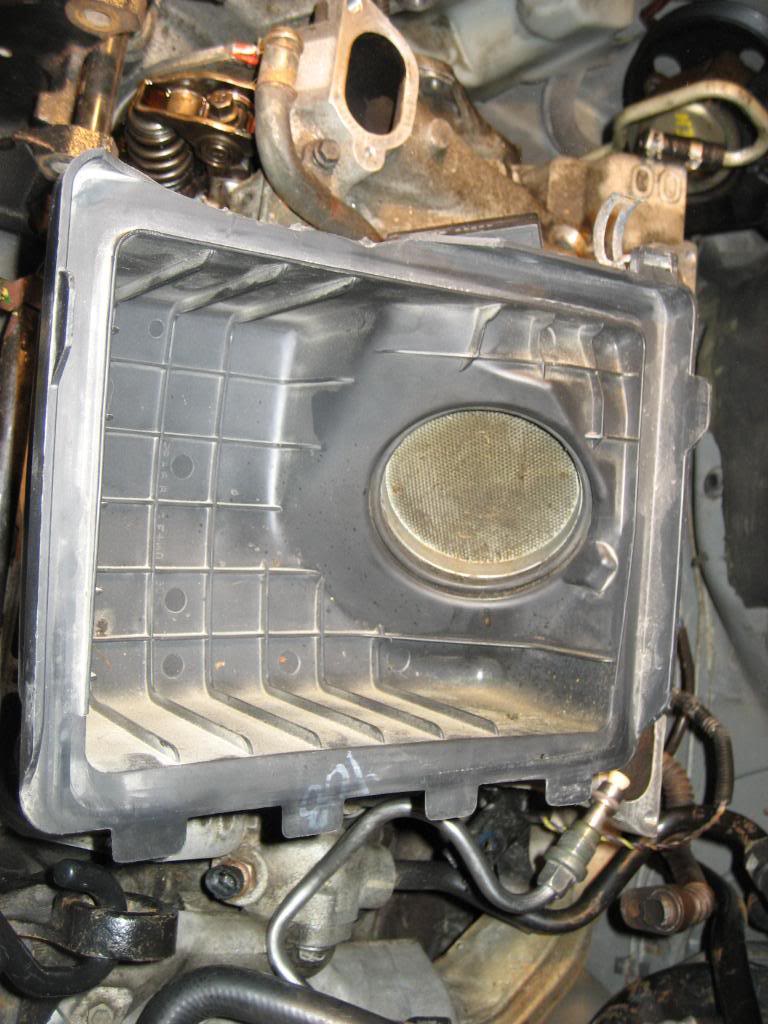
Filter in housing:

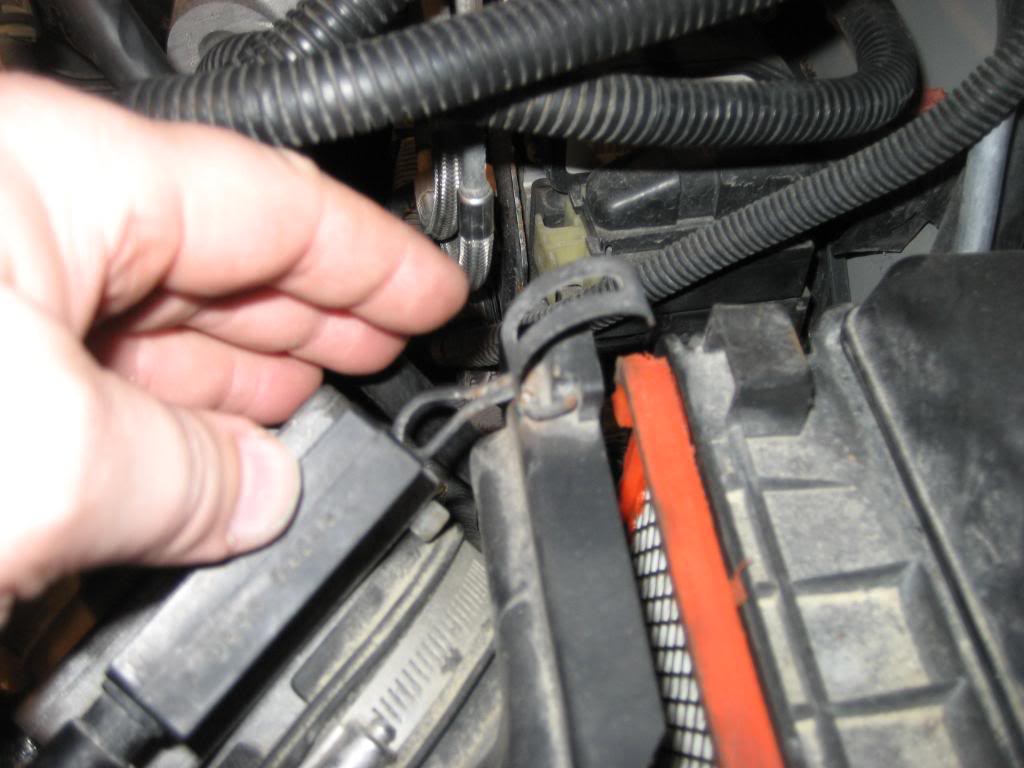
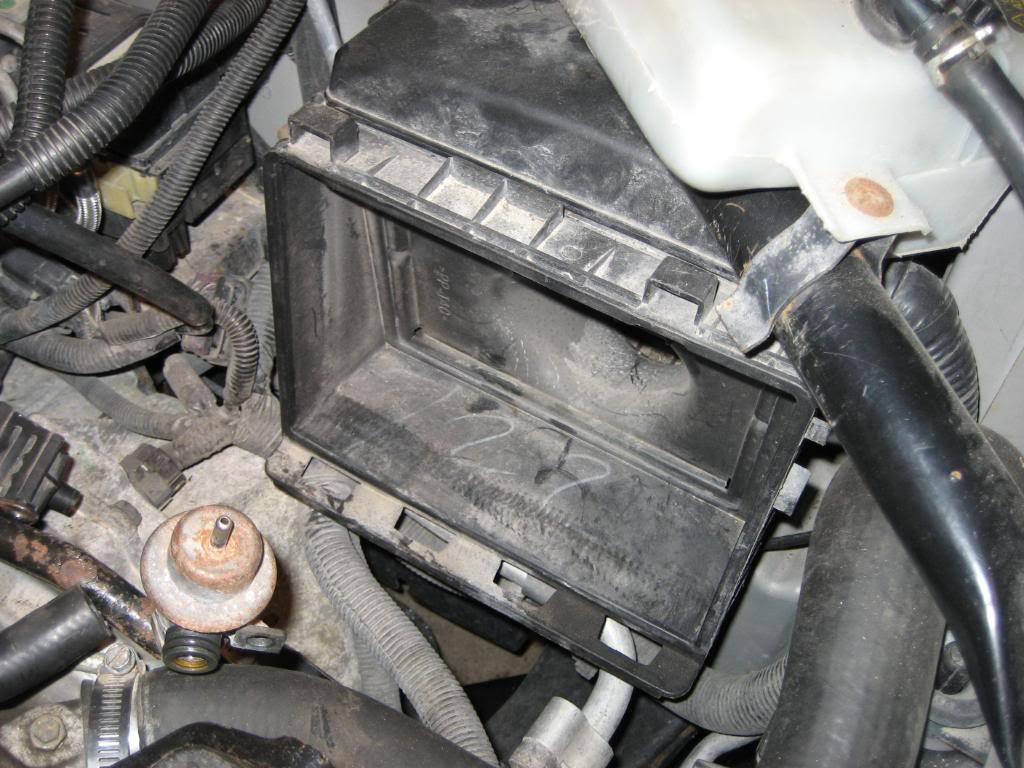
Filter taken out of housing. If you didn't know, your Powertrain Control Module (PCM) computer is mounted right on top of that box, right in the path of air flow to keep it cool. You can see the thick wire harness going into it just behind the black engine brace and right under the coolant recovery tank:
It ended up out of focus, but that white thing in the yellow circle - that's the draincock:
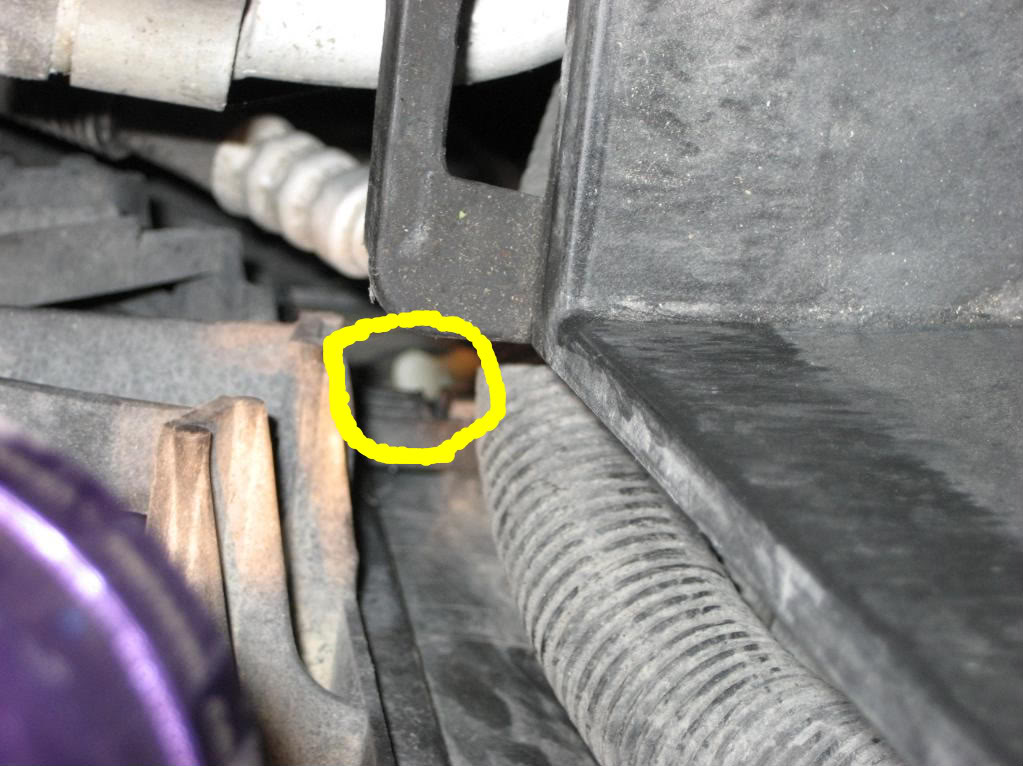
So, either from the top or lay down on your back and reach underneath, but have that pan under there and open that draincock and let the coolant come out until it stops. Then maybe even squeeze the upper and lower radiator hoses to see if anymore will come out. Then go ahead and close the draincock so you don't forget to do it later!
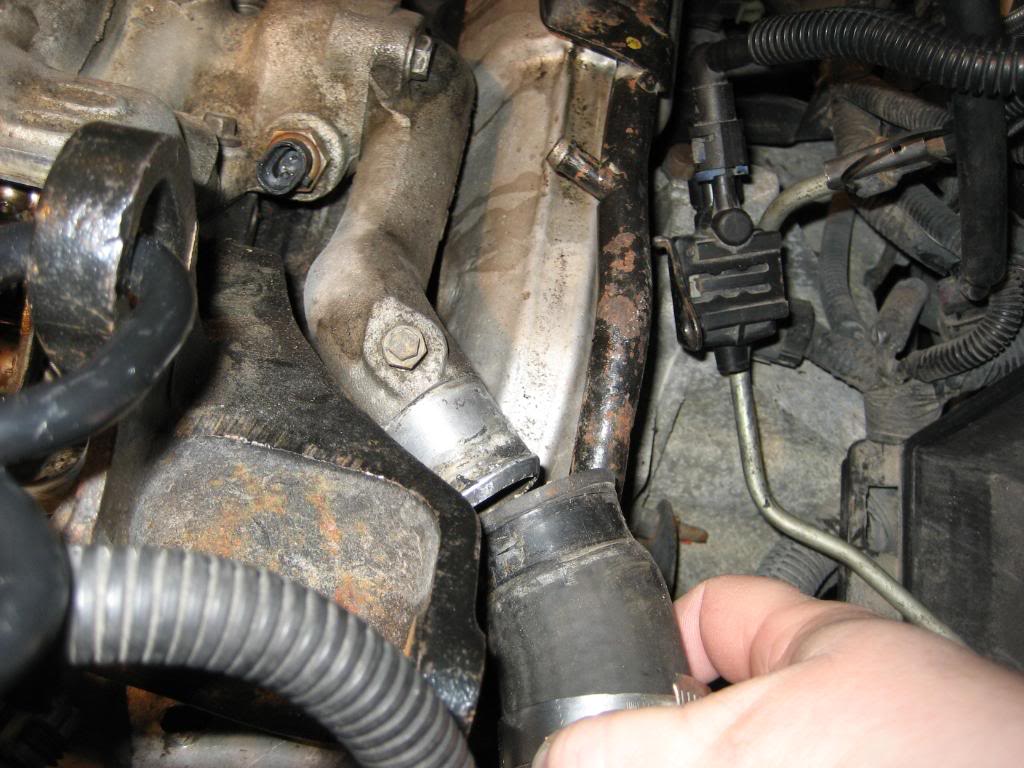
Next, you can use a screwdriver or a ratchet to loosen the clamp on the upper radiator hose at the thermostat housing, and pull the hose off and out of your way:
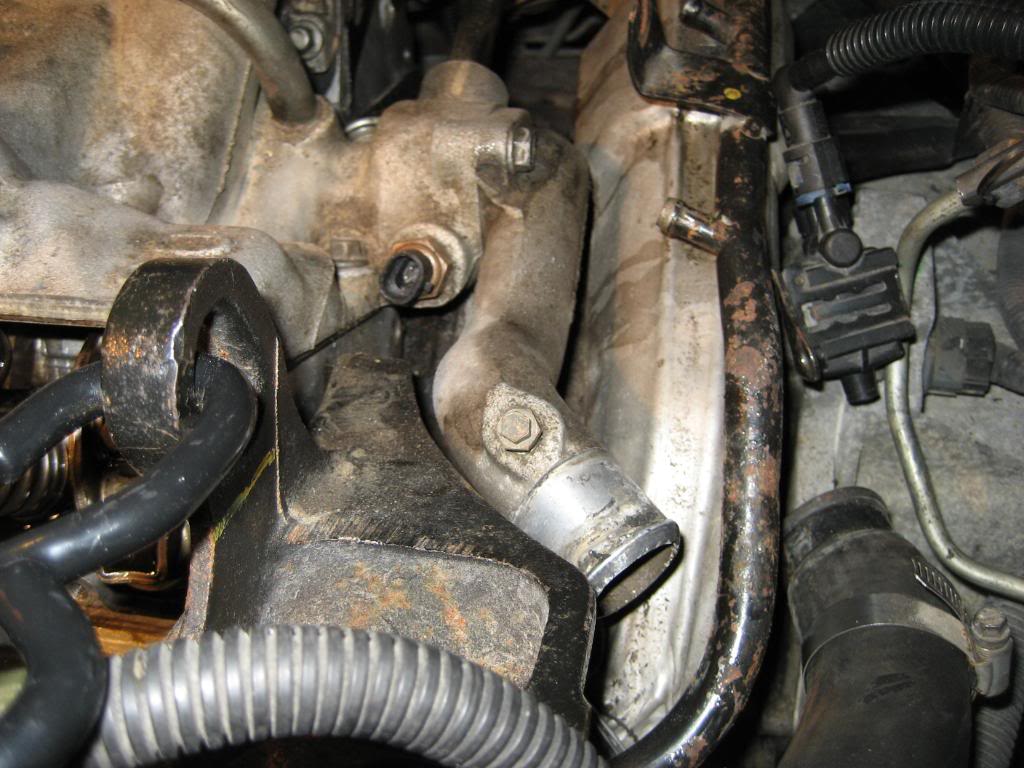
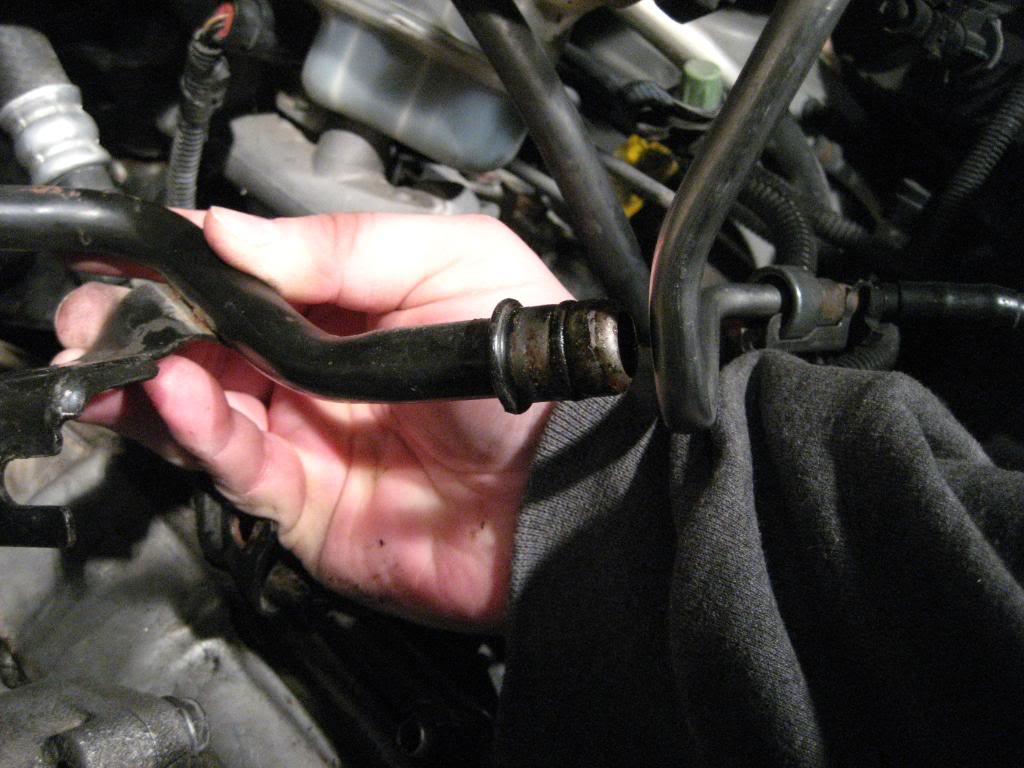
Next we need to get the black metal heater inlet hose that comes out of the back of the thermostat housing off. This pipe just slides into a hole in the back of the housing, and has a tab welded to it a few inches back. That tab has a 90 degree bend in it and a slot cut in it. That slot fits over a stud that sticks out of the cylinder head, and has a 13mm nut on top holding the pipe in place. It's not that easy to get to, and you can't really see what you're doing:
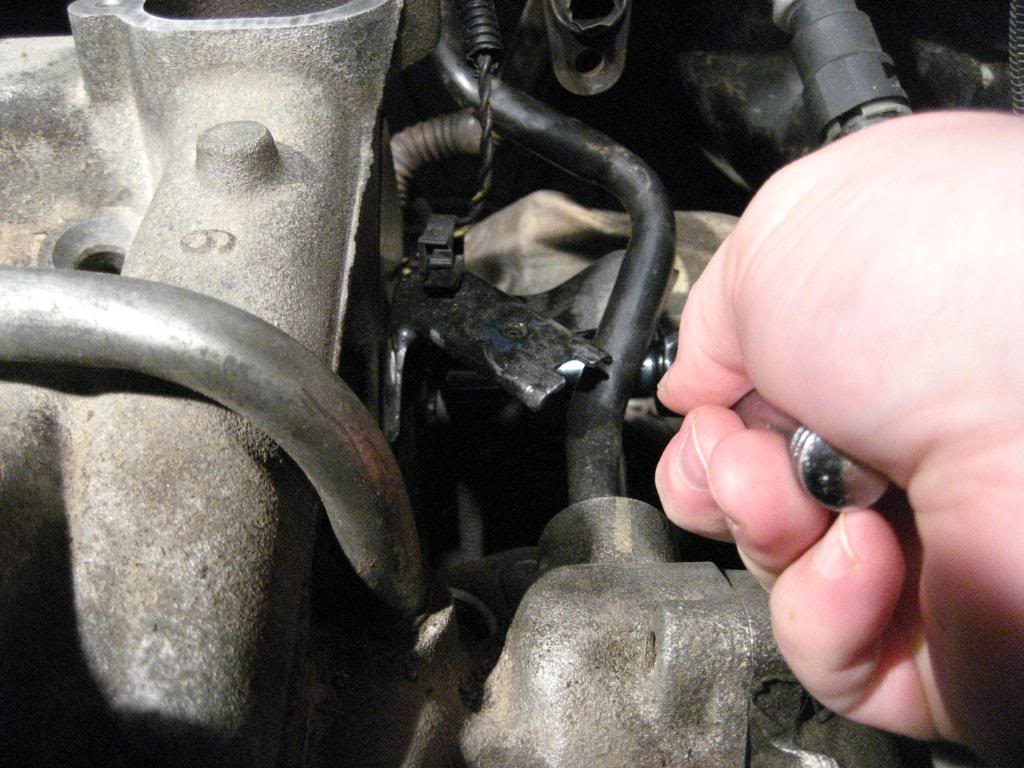
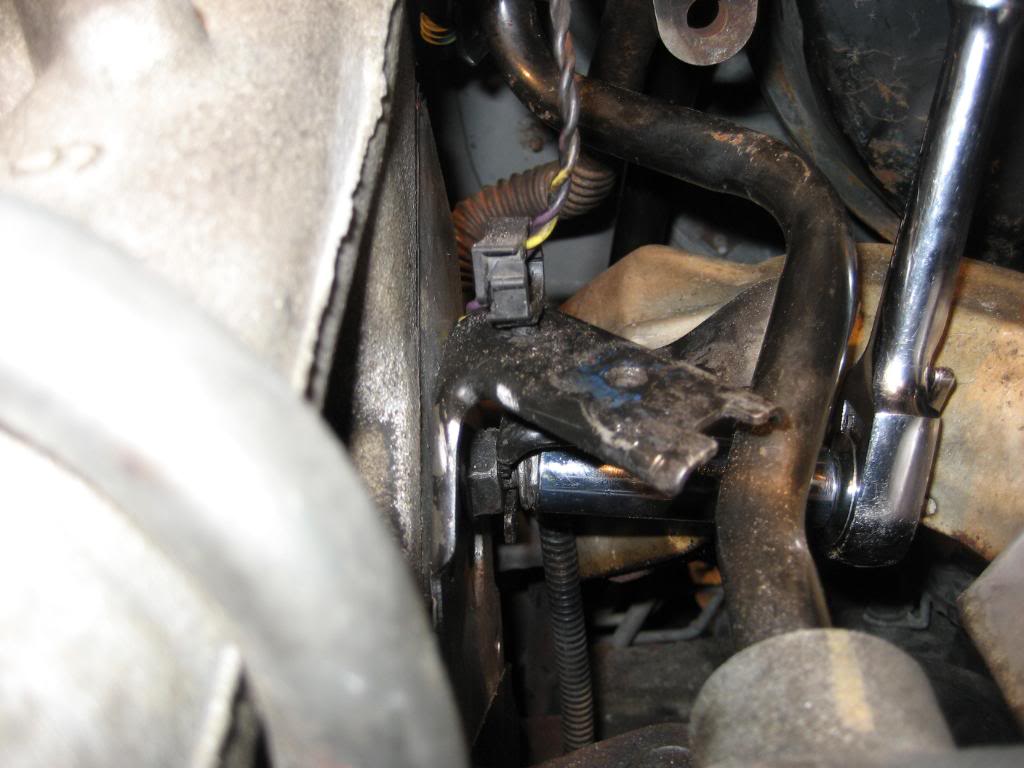
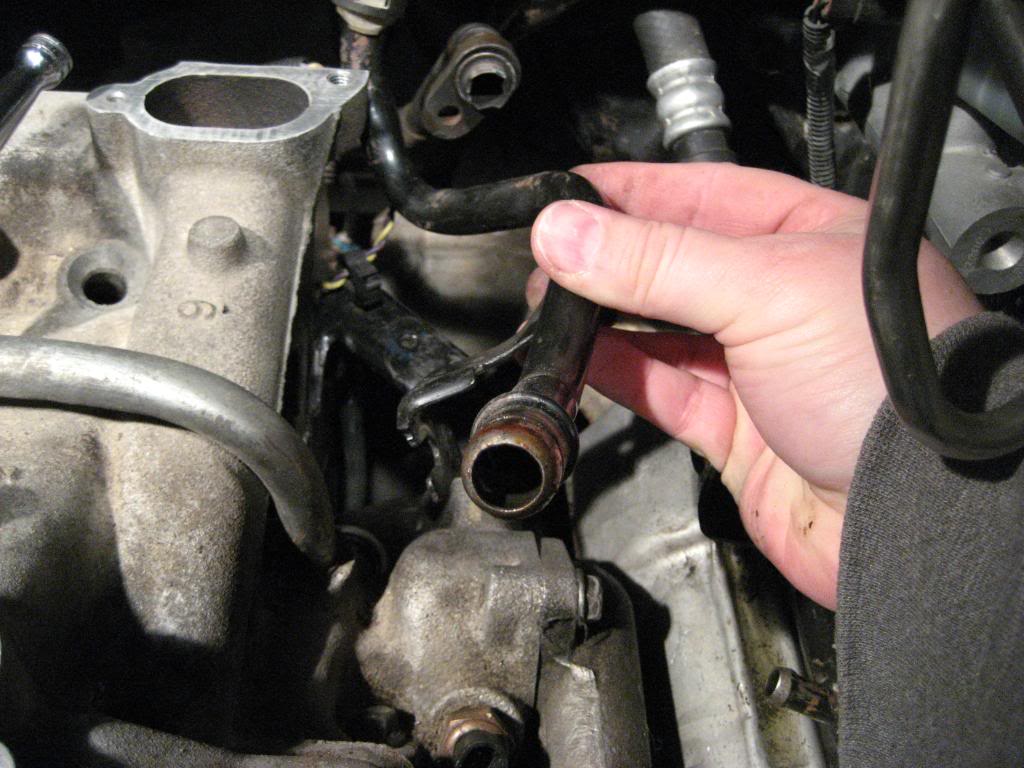
With the nut off, you can now slide the pipe back and out to clear the stud:
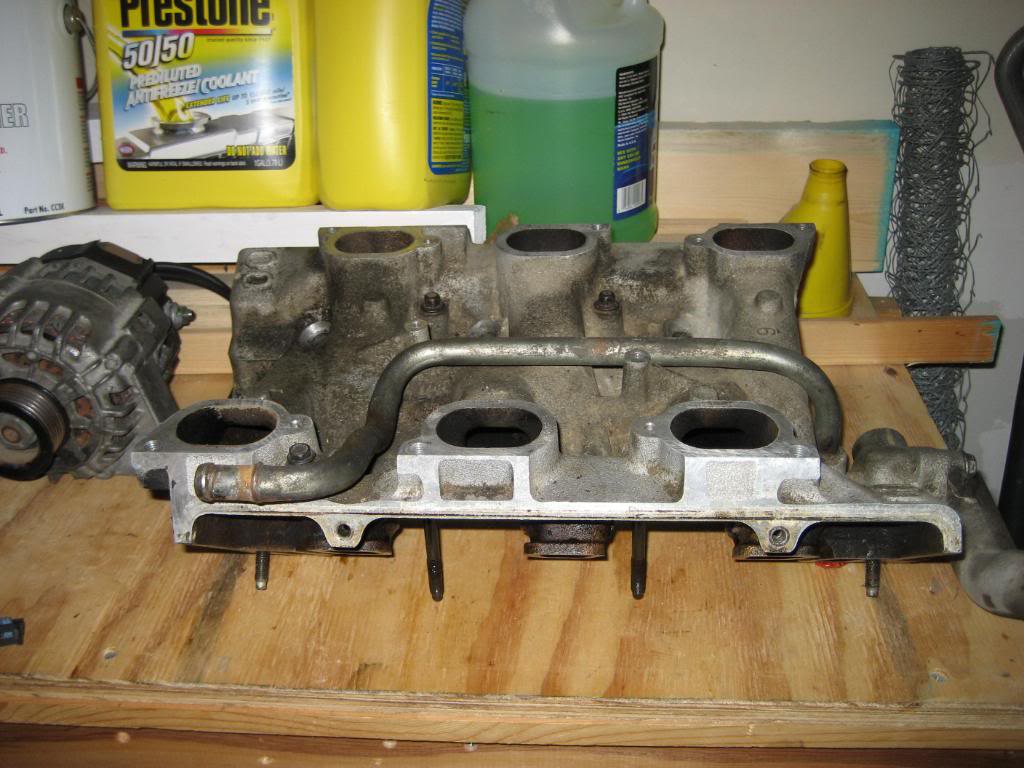
Now, we can finally get that manifold off!
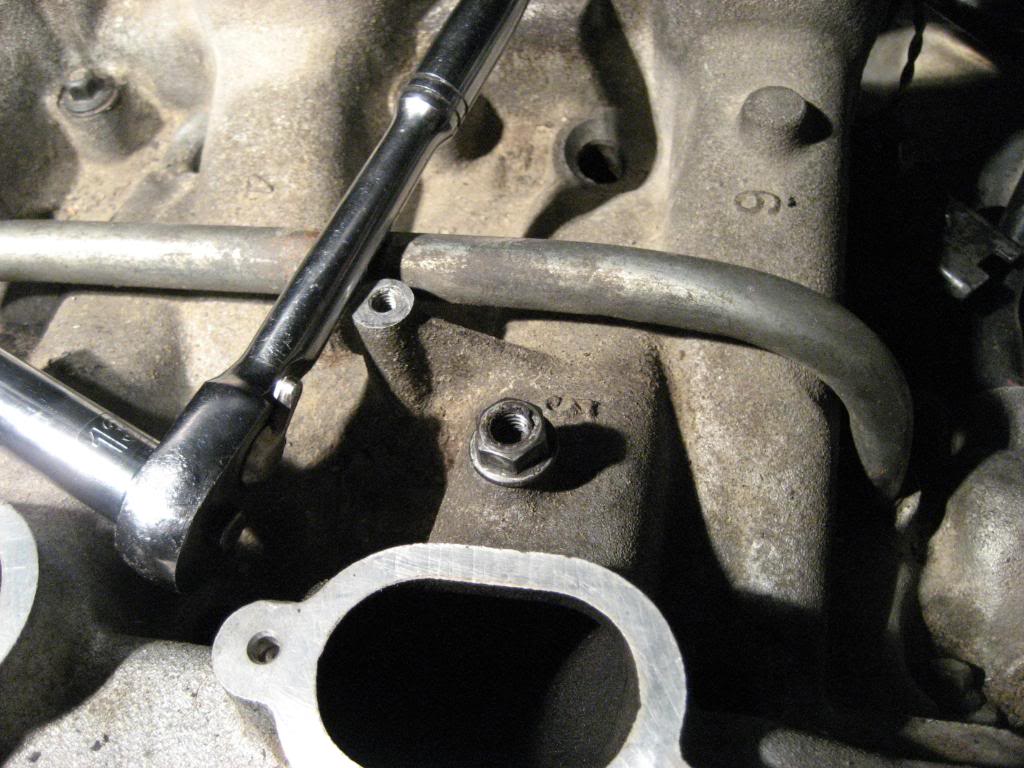
There are 8 10mm bolts holding the manifold on. 4 are right on top, circled in yellow - you can see two of them, the other two are hiding in the shadows directly across from those:
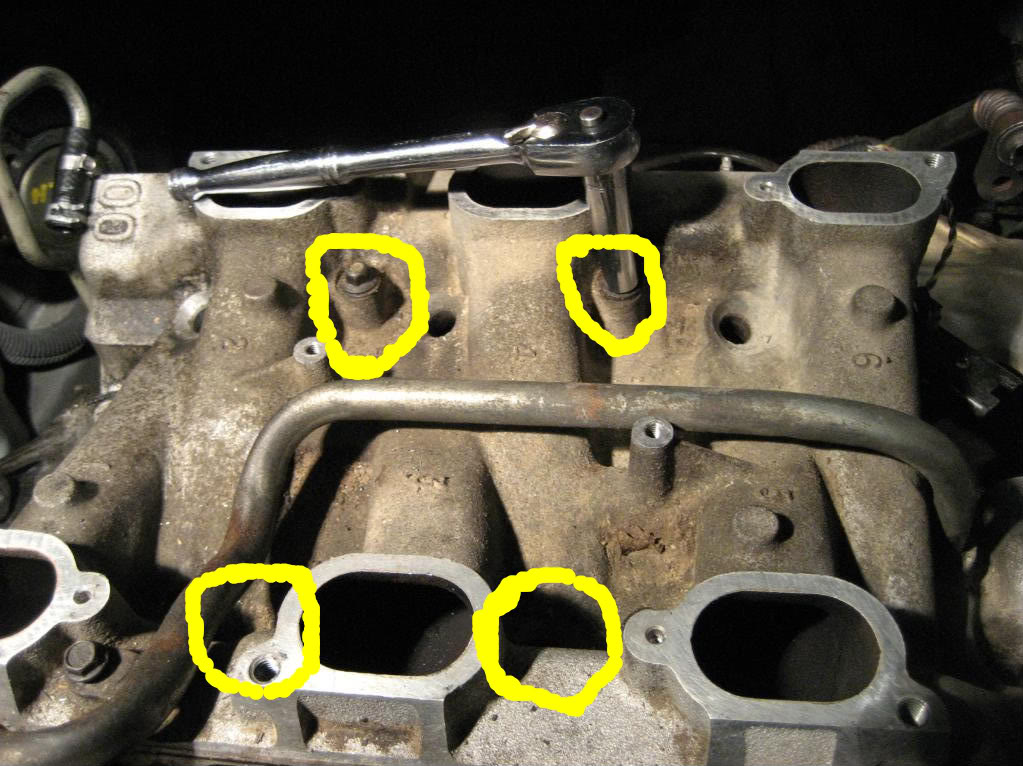
The other 4 are on the sides - 2 on each. 3 of those aren't so bad to reach. The 4th one sucks. Bad...
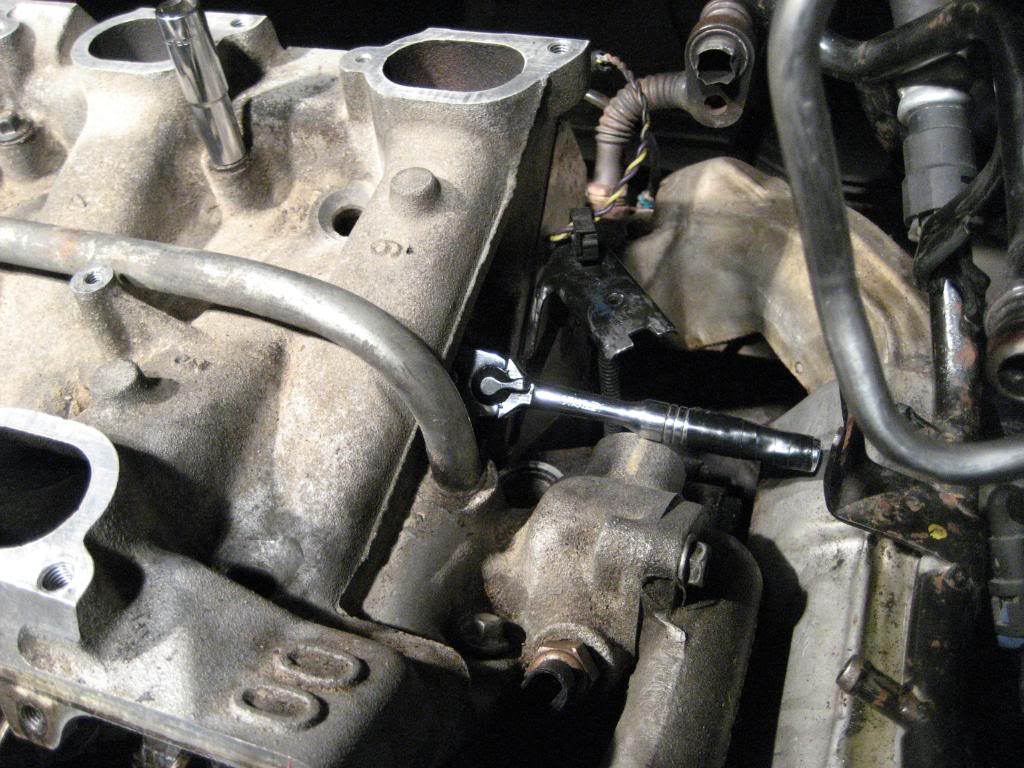
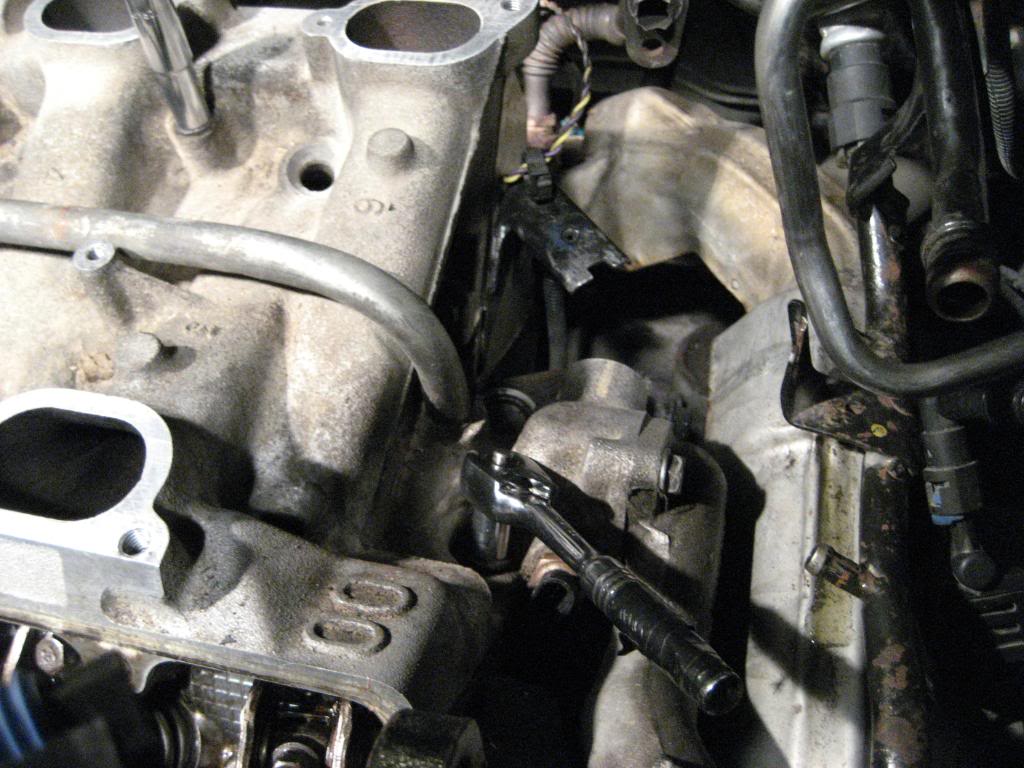
The front left one is the one that sucks. The engine front cover where the power steering pump was mounted is right in your way from any serious swing motion with a ratchet or a wrench.
Add to that, my standard 10mm socket's walls were thick enough that I couldn't get it to even get ON the nut, and even if I could, but the time you add a 3/8" drive ratchet on top, you had no vertical clearance to begin untightening the bolt. I don't even think there's room for one thread to be backed out before you'd hit the overhanging manifold lip.
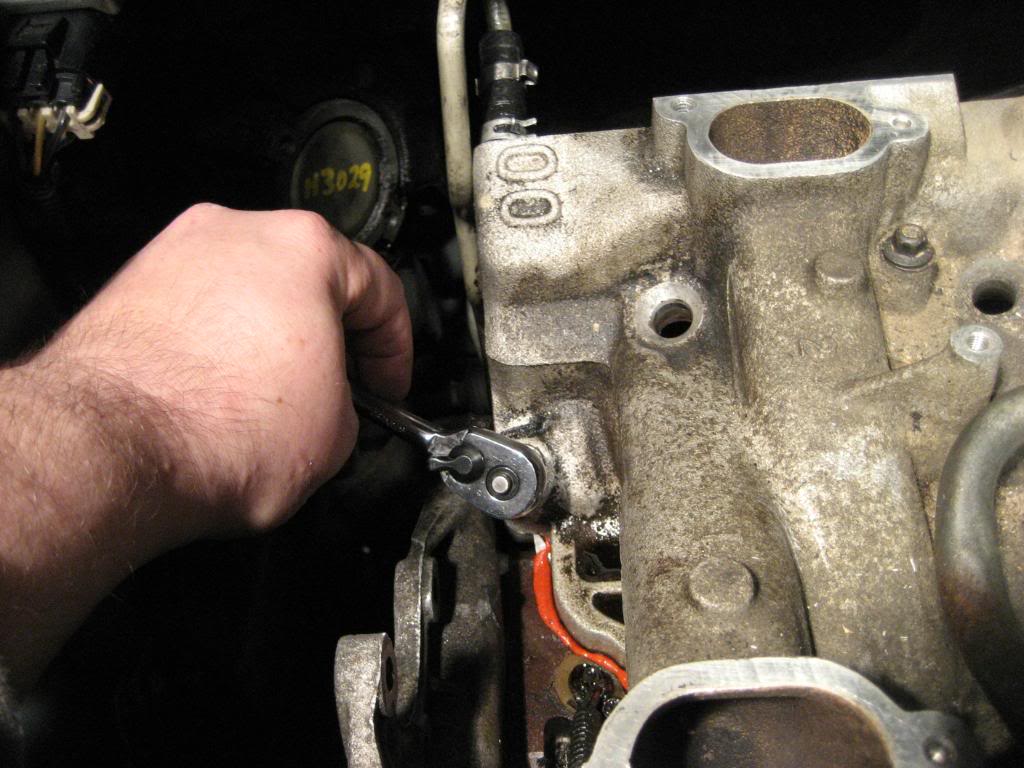
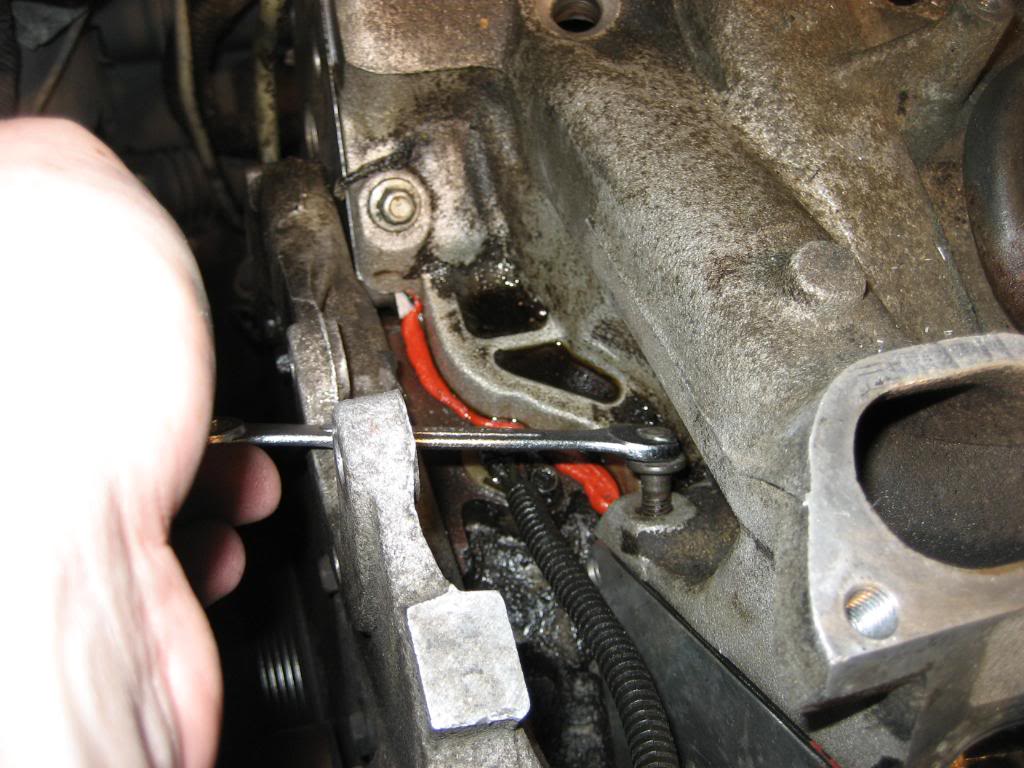
The only thing I found that worked, was a little 1/4" drive ratchet with a 10mm socket from one of those bit/driver sets. The only reason that socket worked was because it was a very thin, straight walled socket and it fit right on. However, even with that, it was still literally one click at a time was all the swing I could get. Fortunately, these bolts are not on tight (or they're not SUPPOSED to be on tight), so you shouldn't have to struggle with them, it just takes a lot of time.
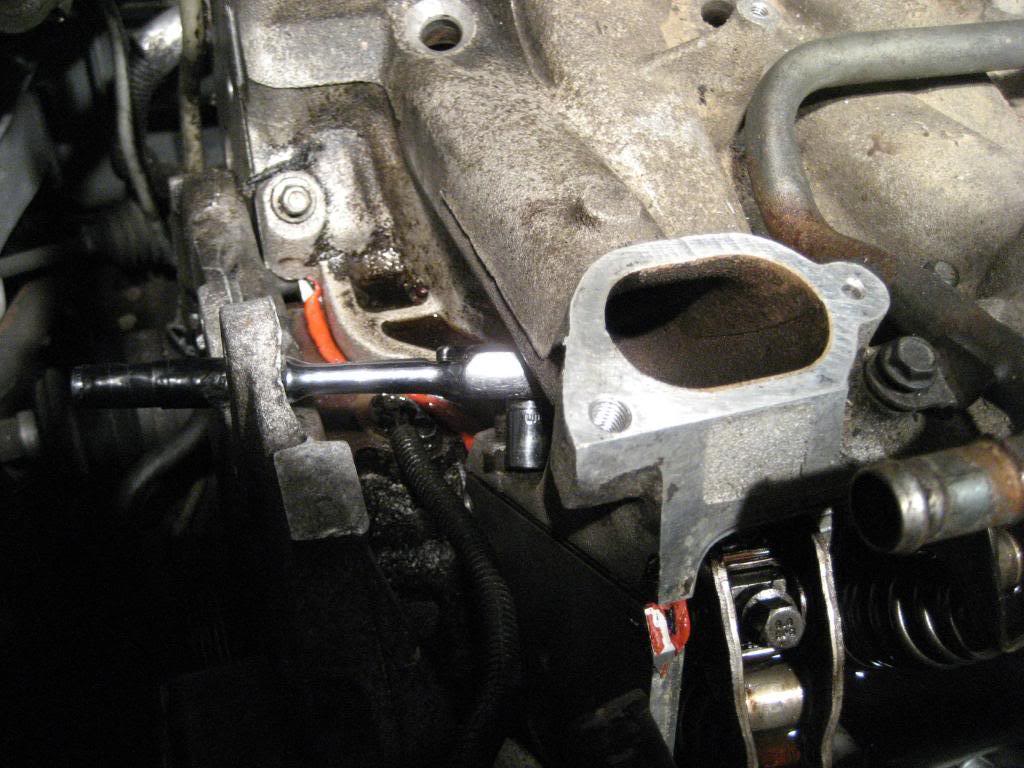
After I got as high as I could go with the ratchet, I switched to a 10mm wrench and even then at a weird angle to loosen it more. At this point, I wasn't having to use pressure any more, I was just using the wrench to back the bolt out, so I wasn't too concerned about the angle I was at.
After you make sure all the bolts are loose enough that they're just sitting in their holes not threaded at all, you can take the manifold off. I can't remember if it's these bolts that need to go back in their same spots or not, so just to be safe, I left them in the manifold so they'd go back where they came out of. I know there's a specific torque sequence when tightening the bolts, but just don't remember if it matters which bolts go where -they're all the same size.
In the valley of the manifold on the sides, more than likely there should be a bead of gasket sealant or Form A Gasket going from one head to the other on both sides. It may take some GENTLE prying with a prybar or long handled screwdriver to break that seal so you can get the manifold off.
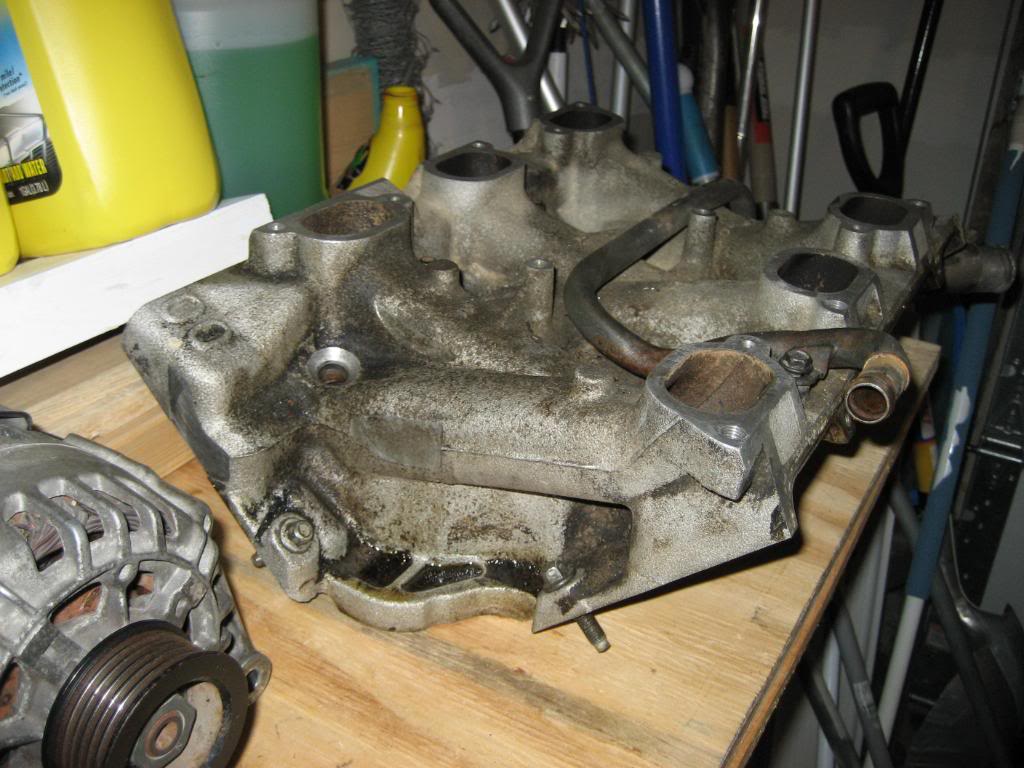
Once you break it free and it's sitting on your bench, it'll look like this:
Left end showing the 'fun' bolts:
Right end showing thermostat housing:
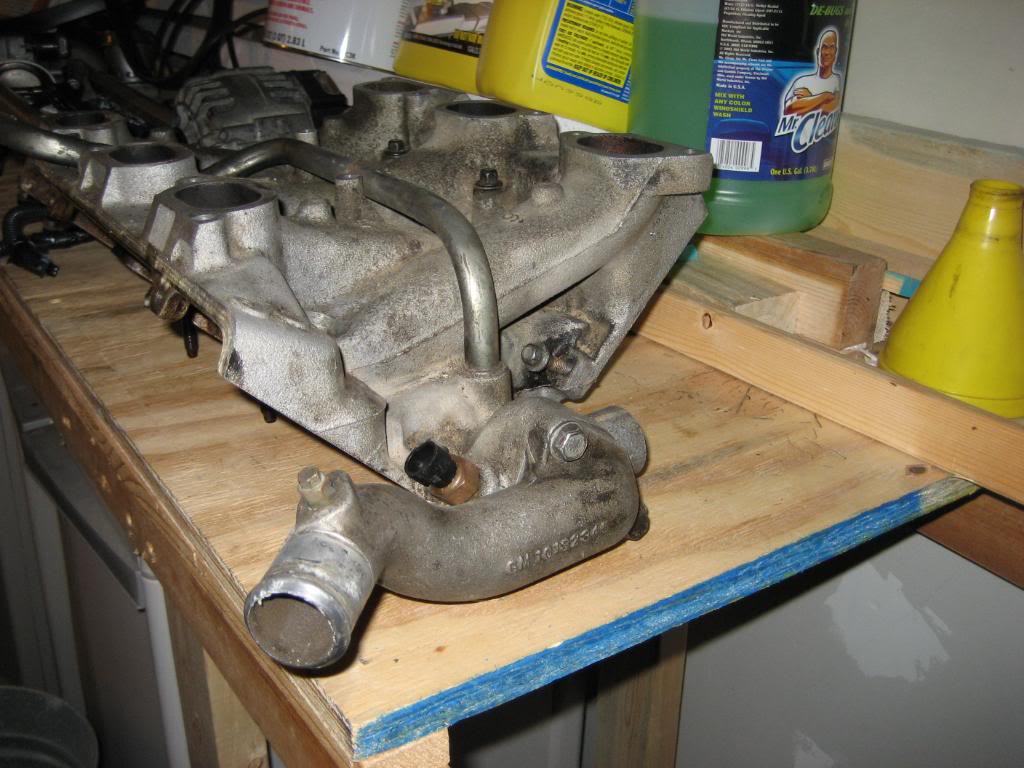
If you want to get yours out, just take those two bolts off where the pipe meets the manifold and the thermostat is right there. I put a new one in last time this was put together, but I'll probably check on it when I get to re-assembling things to see how it's doing.
Underside of manifold - you can see we got a good seal on the right side, but not so great a one on the left side:
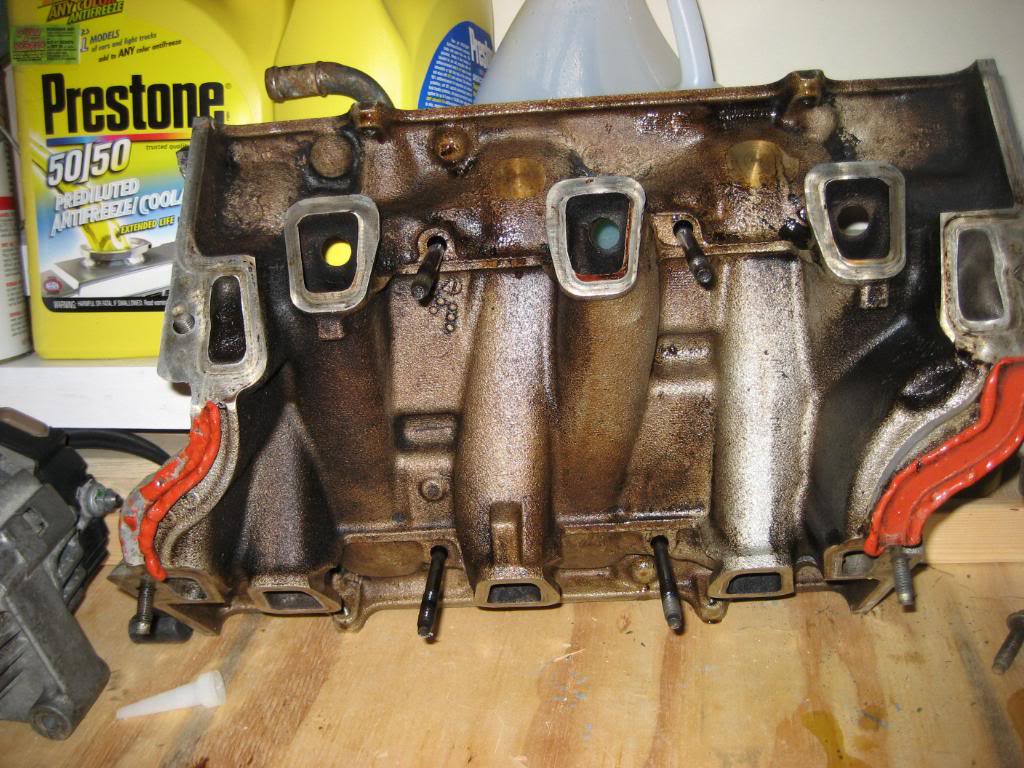
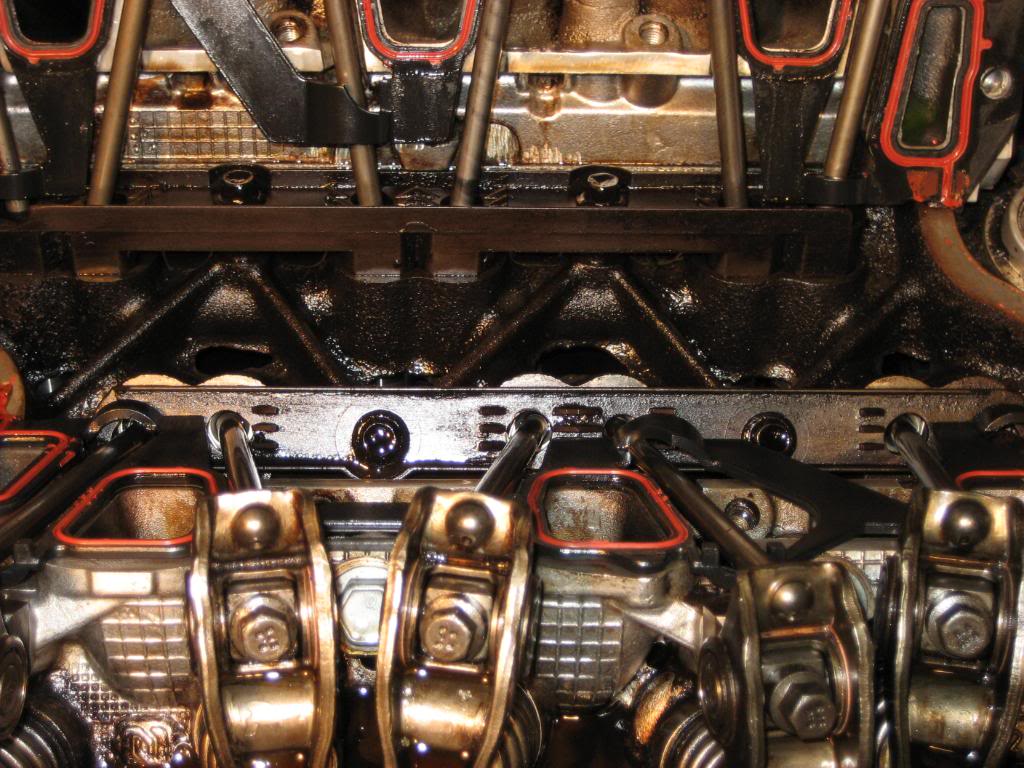
And now we're REALLY getting into it here! Now, you can see the rocker arms, push rods, valve springs and the the black things going across the port openings with the orange rectangles? That's the infamous Lower Intake Manifold gaskets that go bad on these engines. These are actually brand new as they were put on at the last tear down just a few months ago, so this is what new ones look like. The silver curved thing on the right side of the picture is the heat shield covering the crossover exhaust pipe. You couldn't even see any part of this before with all that other crap piled on top of it.
The two skinnier ports to the outside of each head are coolant passageways, while the 3 big ones in the middle are the combustion or intake ports. If you look inside those ports, you'll see the back (bell) sides of the valves.
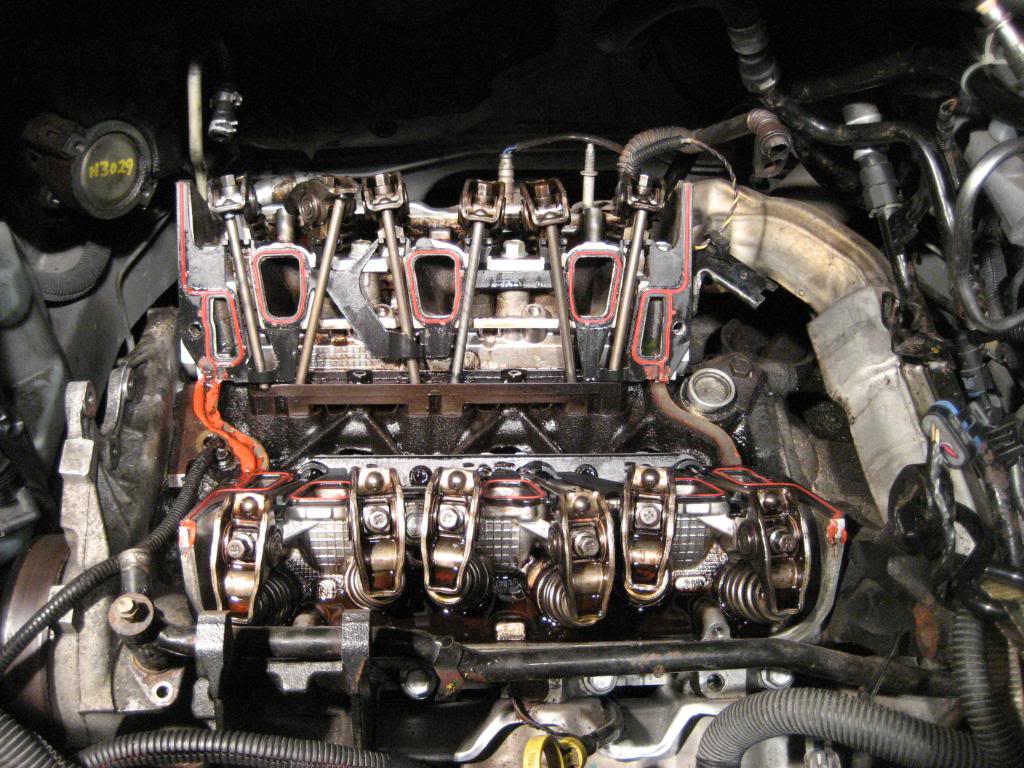
A shot down into the valley in the center. The brown plastic (!?) rectangles that the push rods disappear into are the lifter keepers. Note how the gasket winds its way sometimes in front of and other times behind the push rods: